skip to main |
skip to sidebar
 Challenges
Bearly Mine (20) - 3 Design Papers
Simon Says - Anything Goes
This week's challenge at Lili Of The Valley is the theme 'Button It' so we want to see what you can do with all your buttons. Lisa and Laila have kindly donated a £15.00 voucher for one lucky winner to spend in the LOTV online shop. Don't forget though, to be eligible for the prize you MUST use an LOTV product on your creations.
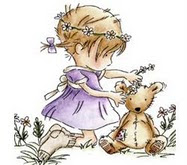
This week I have made another Christmas card to add to the pile which is growing by the week. I have used the gorgeous papers from Nitwit Collections (Simply Joys) again, these have fast become a favourite of mine. Nip on over to the shop and have a look at all their gorgeous kits as you too will fall in love with them. I have used one of LOTV's new Christmas stamps again for this card. This one is called 'Oh Christmas Tree' and I have coloured it with promarkers and glitter. I punched a couple of stars, added a gem star and placed them on the small panel. Onto some punched leaves I placed some gold bells. Finally, as the challenge is to use buttons I made a 'button' Christmas tree. Hope you like this card, thanks for looking.
Card Recipe
Stamp - LOTV
Digi Papers - Nitwit Collections
Bells - Cake Decoration
Buttons/Gem - Stash

 Challenges
A Gem Of A Challenge (30) - Sketch
Ooh La La (89) - Punches/Dies
Digital Tuesday (129) - People Images
Simon Says - Dies/Punches
Stampin' For The Weekend (17) - What A Cutie
Here is a card using another new Magnolia stamp that I have waited a long time for, isn't she so cute? I have coloured her with promarkers, chalk and a silver Sakura Stardust pen to add a bit of sparkle. I have followed the great sketch provided (although I turned it), and if you look very carefully at the bottom right of the image you will see I have made a bit of a corner in pink using a border punch. I finished the card simply with some silk flowers. Hope you like it, thanks for looking.
Card Recipe
Stamp - Magnolia
Digi Papers - Summertime Designs
Flowers - Stash

 Challenges
Our Creative Corner - Blue/Touch Of Pink/Texture/Metal
Magical Monday (31) - Christmas In September
Crafty Creations (137) - Fabulous Fairies
The Rainbow Lady (171) - White Space
This week's challenge at Lili Of The Valley is a colour challenge so we want to see your 'Aqua & White' creations with the option of 'Glitter'. This week we have TWO great sponsors for the challenge. Not only have we a great prize from Wild Orchid Crafts but Lisa and Laila have kindly donated a £10.00 voucher for one lucky winner to spend in the LOTV online shop. Don't forget though, to be eligible for the prize you MUST use an LOTV product on your creations.
This week I decided not to use any design papers so I have used embossed panels instead (all cuttlebug embossing folders). The image has been coloured with promarkers and glitter and layered with nesties. I layered several flowers and a metal spacer and attached these to the card with a brad. Hope you like this one as much as I do, thanks for looking.
Card Recipe
Stamp - LOTV
Flowers/Spacer/Brad - Stash

 Challenges
Pollycraft (109) - Baby Love
Shabby Tea Room (79) - Boys Will Be Boys
Bearly Mine (19) - Button It Up
Creative Card Crew - Babies
Passion For Promarkers (117) - Bears
Fab 'N' Funky (89) - Bingo (Top Line - Embellishment/Buttons/Stamped Image)
Charisma Cardz (37) - Sky
Crafty Ribbons (2) - Anything Goes
Totally Papercrafts (84) - Clean & Simple
I have wanted to make a 'new baby' card using this sweet digi stamp from Pollycraft ever since I saw it but never seemed to get the time. The base card is 'sky' patterned and has been hanging around so long I can't remember where it came from. Anyway, I then distressed and glittered some blue card and and attached it with D/S tape. Next I coloured the image with promarkers and glitter, distressed, inked and glittered the edge before layering with nesties. I then threaded organza ribbon through the holes around the edge before attaching with foam pads. I found a couple of teddy bear buttons in my stash which went nicely with the image. A circular sentiment finishes the card. Hope you like it, thanks for looking.
Card Recipe
Digi Stamp - Pollycraft
Circular Sentiment - LOTV
Ribbon/Buttons - Stash


 Challenges
Sketch & Stash (70) - Free Choice Sketch (NO: 9) (New Stamp)
Simon Says - Song /Movie Title (This Little Light Of Mine)
Cute Card Thursday (182) - Anything Goes
M.A.W.T.T. (116) - Sparkle
Paperplay (37) - Punches/Dies
This week's challenge at Lili Of The Valley is the theme 'Red/Green/White' and Lisa and Laila have kindly donated a £10.00 voucher for one lucky winner to spend in the LOTV online shop. Don't forget though, to be eligible for the prize you MUST use an LOTV product on your creations.
I started this one with a square base card and then cut the front down diagonally.
Next I added a layer of white card to back and front and covered these with these gorgeous papers called 'Simply Joys' from Nitwit Collections. I have used one of the new LOTV stamps called 'Shine A Light' and coloured it with promarkers, glitter and flock. I also covered the lantern with diamond glaze before cutting and layering using nesties. This was then attached to the front with foam pads. I coloured the card candi with a promarker and added these to the back. A stamped circular sentiment, again cut and layered with nesties finishes the card off. Hope you like it, thanks for looking.
Card Recipe
Stamps - LOTV
Digi Papers - Nitwit Collections
Card Candi - Craftwork Cards

 Challenges
Bah Humbug (35) - Christmas Sentiments
Less Is More (31) - Metallic
Here is a quick Christmas card done quite simply by starting with a black base card. I then added a layer of gold mirri card followed by a layer of tartan paper. I then added a die-cut circle of gold pearl card followed by my sentiment. I embellished it with poinsettias punched from hologram and gold mirri card adding a gem to the centres. I hope this counts as 'metallic' and CAS. Either way, hope you like it, thanks for looking.
Card Recipe
Paper - Scrapbook, Scrapbook

 Challenges
Lili Of The Valley DT (110) - Sketch
Passion For Promarkers (115) - Anything Goes
I Love Promarkers (81) - Anything Goes
Charisma Cardz (35) - Anything Goes
Cute Card Thursday (180) - Punches
This week's challenge at Lili Of The Valley is to follow a great sketch and Lisa and Laila have kindly donated a £10.00 voucher for one lucky winner to spend in the LOTV online shop. Don't forget though, to be eligible for the prize you MUST use an LOTV product on your creations.
Following the great sketch I have attached paper and layered panels to my base card. On the two panels I have added a punched photo corner decorated with gems. The border strip has been punched and ribbon added. The sentiment has been stamped, with added stars that I have glittered. The main image is one of the new stamps from LOTV's 2nd Christmas release (available 6th September) and is called 'Three Little Angels'.
As soon as I saw these I fell in love with them, they are just so sweet. I have coloured them with promarkers and glitter. Finally, I added some flowers which I also glittered. Hope you like it, thanks for looking.
Card Recipe
Stamps - LOTV/Woodware
Digi Papers - Nitwits (Still Joyful Hearts Too)
Flowers/Ribbon/Gems - Stash

 Challenges
CLP GDT (40) - Sketch
Passion For Promarkers (115) - Anything Goes
I Love Promarkers (81) - Anything Goes
Charisma Cardz (35) - Anything Goes
I am honoured to have been asked to be a guest designer this month for the CLP challenge blog. They have some fantastic sketches to follow each month so why not pop on over and have a look? There is also some great inspiration from all the DT so check out their blogs too. The fabulous prize this month is sponsored by Lili Of The Valley who are kindly donating a £10.00 voucher to spend instore.
Following the sketch I have made an easel card in my favourite pastel colours. The image is another of LOTV's 2nd Christmas release stamps (available 6th September) and is called 'Little Bears - Snowman', so cute! I have coloured the image with promarkers and glitter and added flock to their hats for texture. The backing papers have been distressed around the edge with distress inks. Both the sentiments and the large snowflake have also been distressed with inks and glittered. Having added a couple of ribbons (one on top of the other) I finished off with some pink card candi in the corners. Hope you like it, thanks for looking.
Card Recipe
Stamps - LOTV/Anita's
Digi Papers - Nitwit Collections
Card Candi - Craftwork Cards

 Challenges
Colour Create (78) - Kraft/Red/White or Cream
Stamp Something - Back To School
Totally Papercrafts (81) - Back To School
Allsorts (118) - Back To School
Sunday Sketch & Stamp (70) - Sketch
Here is a 'Back To School' I was asked to make for twins. Having layered up the base card with a few mats I then stamped a ruler to put across the bottom. I then added a pile of books using a great digi stamp. The main image came next and is coloured with promarkers, layered and attached with foam pads. Finally, a little stamped sentiment finishes this simple card. Hope you like it, thanks for looking.
Card Recipe
Stamps - LOTV/Unknown/See D's
Digi Stamp - Bee Crafty
Digi Paper - Pink Petticoat

 Challenges
The Shabby Tea Room (77) - Birthstones (Emerald)
I Love Promarkers (81) - Anything Goes
Simon Says - Anything Goes
C.R.A.F.T. (118) - Sketch
Crafty Ribbons (1) - Christmas
I can't believe how much I like this card considering it is in traditional Christmas colours. I have used another of the gorgeous new stamps from the LOTV new release due out on 6th September. This little beauty is called 'Angelic Harp' and she is definately one of my favourites. I have coloured her with promarkers, glitter and flowersoft. The music is another of LOTV's stamps and has simply been stamped onto cream card. A beautiful organza ribbon and some brads finish the card off nicely. Hope you like it as much as I do, thanks for looking.
Card Recipe
Stamps - LOTV
Digi Paper - Nitwit Collections
Ribbon/Brads - Stash

 Challenges